2019 FreeCAD Tutorial for 3D Printing – 5 Easy Lessons – All 3DP


Check out our FreeCAD tutorial for 3D printing to learn easily how to design, create and 3D print your first 3D model. No CAD or 3D printing experience required.
Welcome to our FreeCAD tutorial for 3D printing. FreeCAD is a 3D parametric modeler, designed to create and customize real-life objects. Its beauty lies on the easiness to modify your designs, together with the open-source principle, and of course, being for free.
In this 5-lesson FreeCAD tutorial, you will learn the basic commands and tools to visualize your ideas on screen for 3D printing. We will construct a seemingly simple object – step by step. After each instruction, you will find pictures highlighting the steps. By the end of this tutorial, you will be ready to print your first self-constructed CAD model.
Lessons
In the first lesson of this FreeCAD tutorial, you are going to learn the basics to handle the program.
1
FreeCAD Tutorial for 3D Printing
1.1 Download FreeCAD
To do so, you need to download and install FreeCAD first. You can download it from FreeCAD.com. The platforms available are Windows (32-Bit, 64-Bit), Mac (64-Bit), and Linux (64-Bit AppImage).
To ensure that FreeCAD is appropriate for a specific project, make sure to visit the FreeCAD forum.
2
FreeCAD Tutorial for 3D Printing
1.2 Getting your units right
Before you start with a project you will have to decide what units you are going to use. In this FreeCAD tutorial, we are going to work by using the metric system.
When you open FreeCAD you should see something comparable to this:
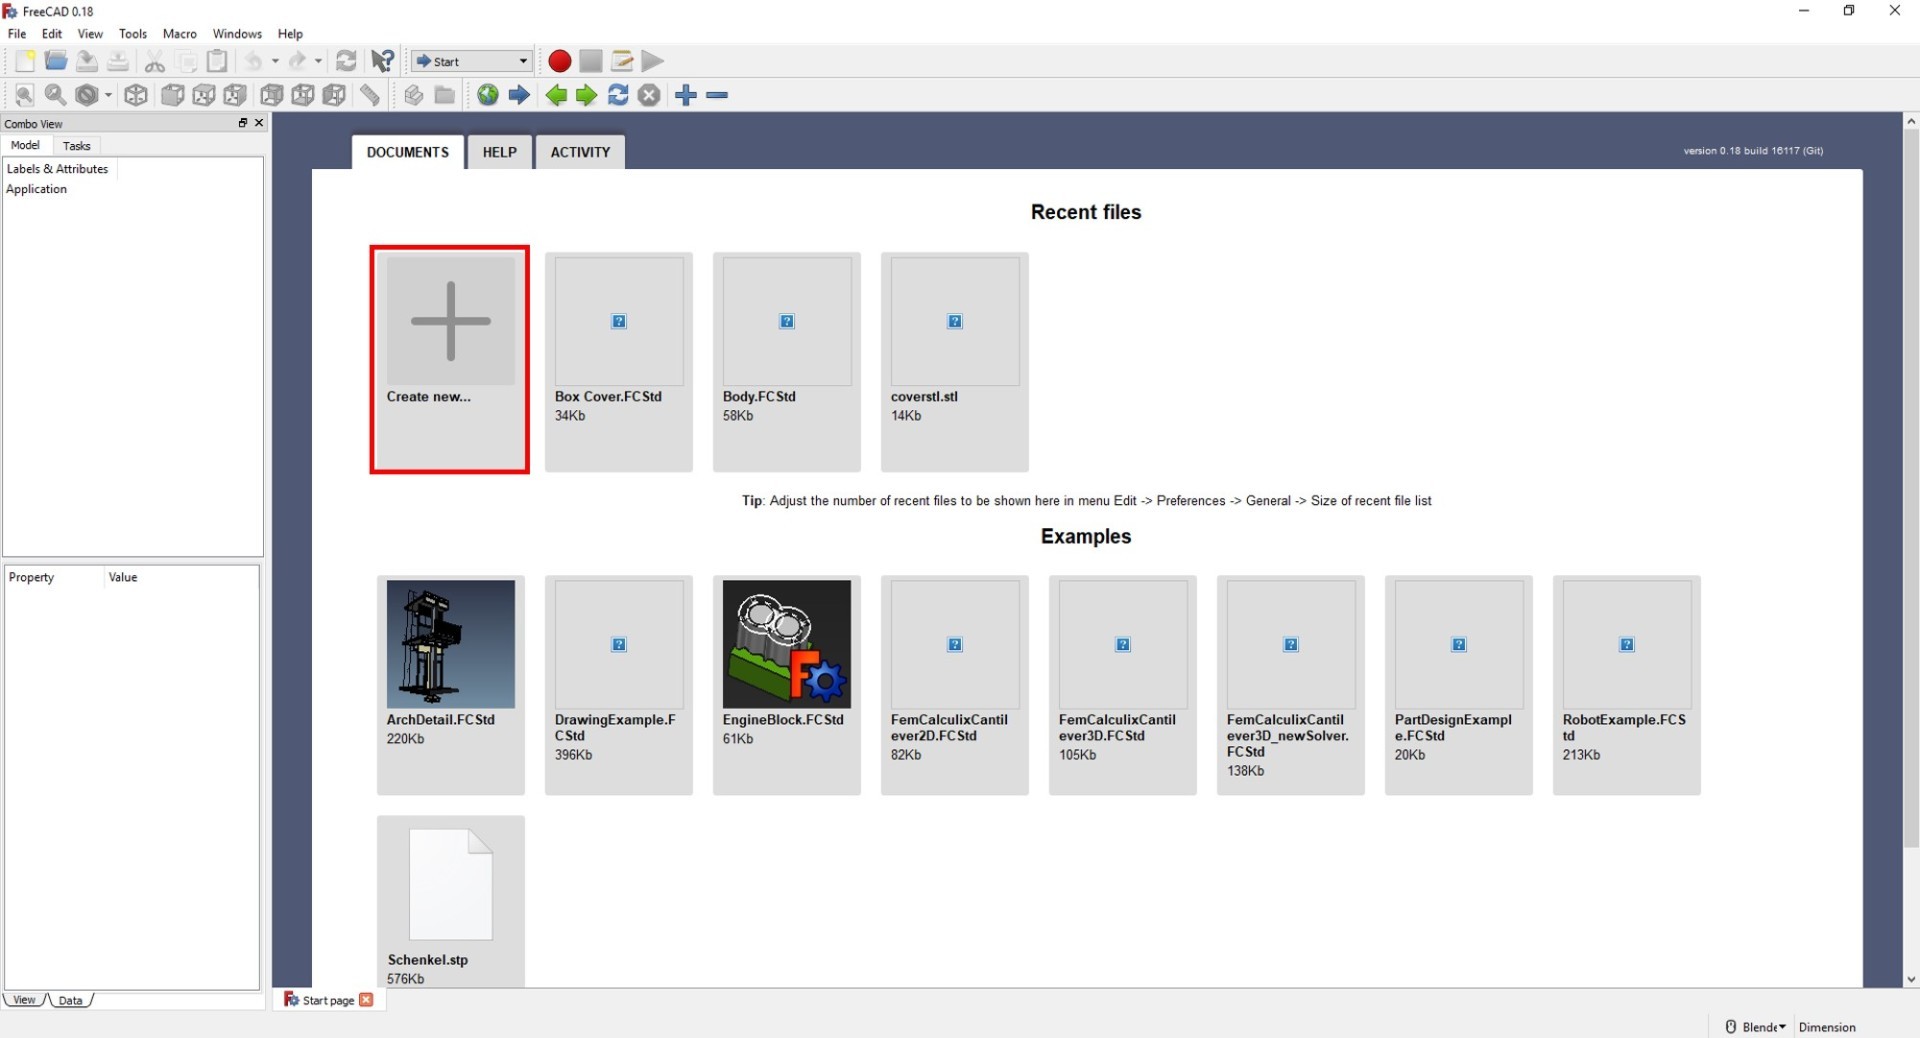
Click on “Create new”. Now you can set your preferred navigation style. For this tutorial, we will use Blender. Rightclick > Navigation styles > Blender.

You are ready to get going! Follow these steps to change the units.
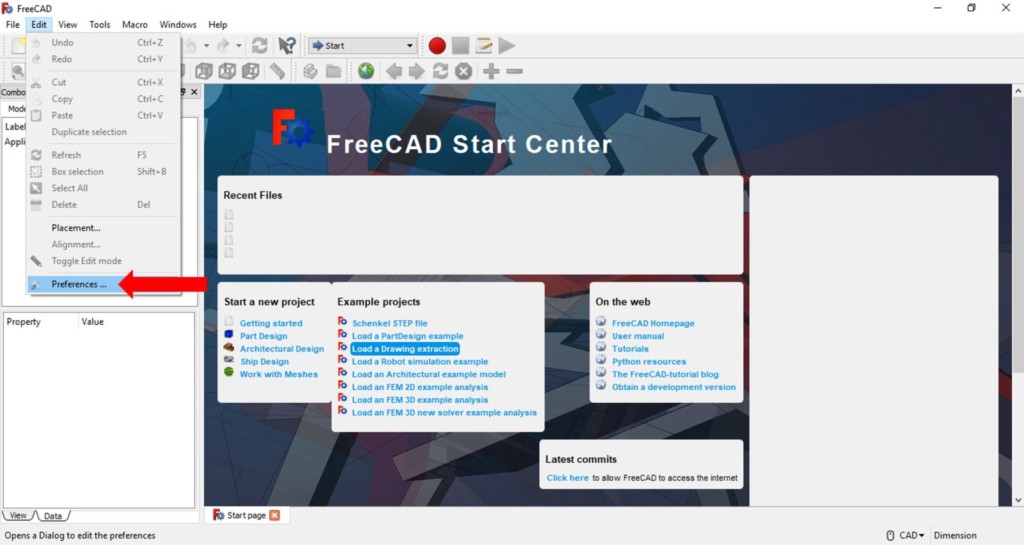
How to change units in FreeCAD
- Click on Edit > Preferences
![Free Cad tutorial]()
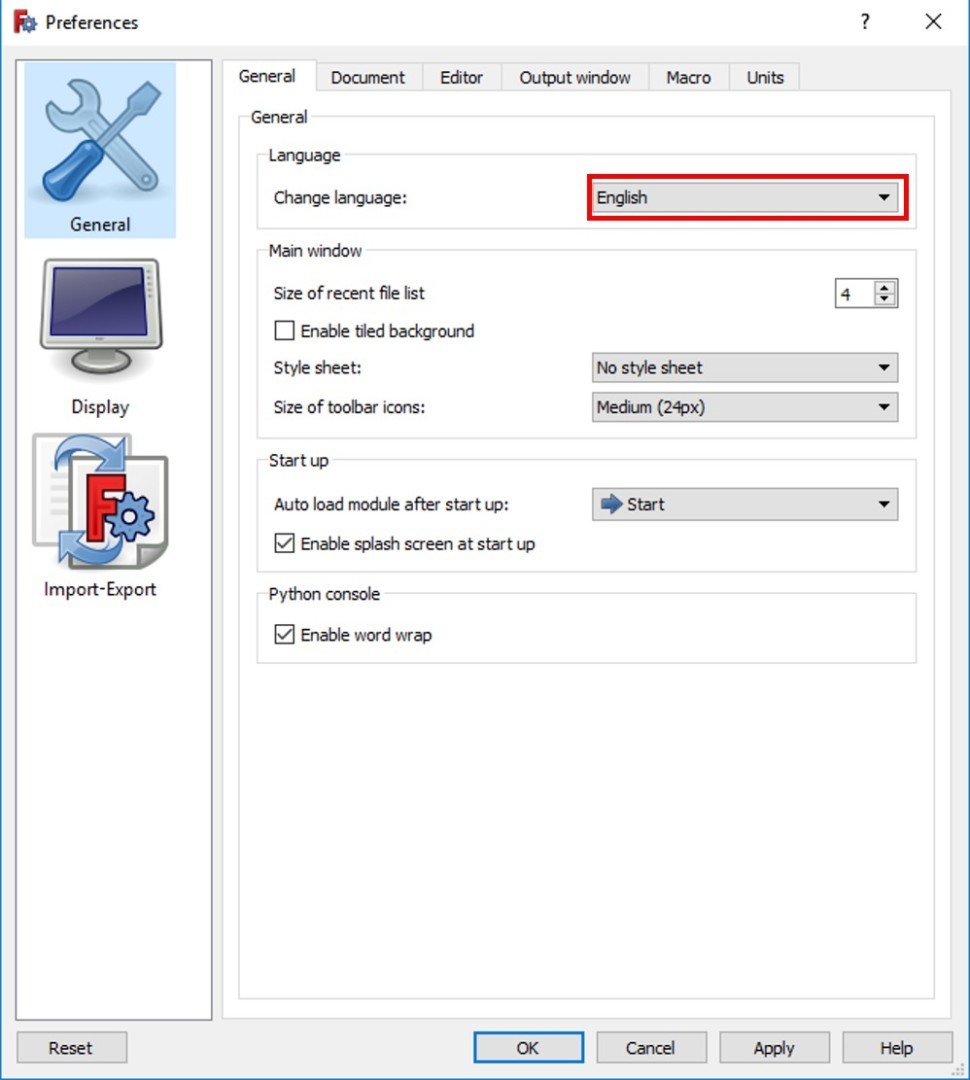
- Select General in the popped up window
![freecad tutorial set to English]()
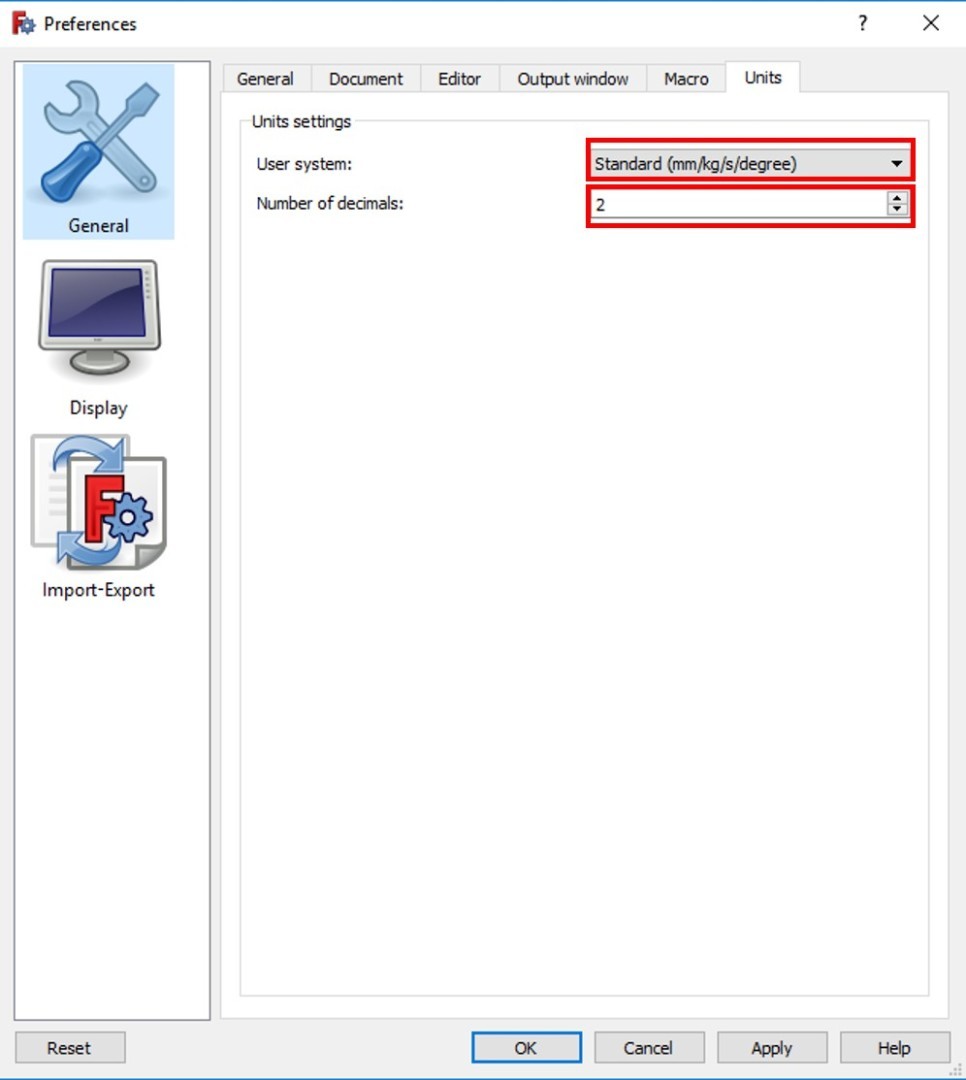
- Go to Units and change the User System to “Standard” and confirm by pressing “OK”
![freecad tutorial metric system]()
3
FreeCAD Tutorial for 3D Printing
1.3 Get your views organized
Now start a new document by pressing CTRL N. You will see a new, unnamed tab opening in the bottom left side of the window.
If the Combo View window on the left is already open you can skip the next step.

Open the Combo View by clicking on View > Panels> Combo View
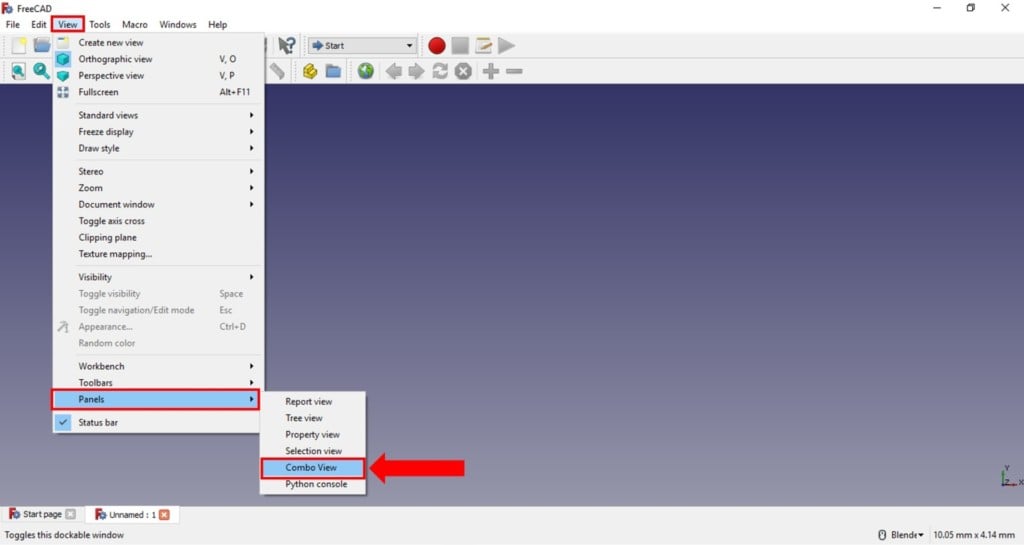
This window is very useful to issue commands quickly. It also contains the Tree and Property view which allows you to have a closer look at the structure of your project.
4
FreeCAD Tutorial for 3D Printing
1.4 Sketch a base
5
FreeCAD Tutorial for 3D Printing
1.5 Setting new points
6
FreeCAD Tutorial for 3D Printing
1.6 Moving objects
You can also move the object around and take a look at it from different sides.
- Holding the middle mouse button and moving your mouse will rotate the object. Note that this function is available after right-clicking and selecting Blender under Navigation styles.
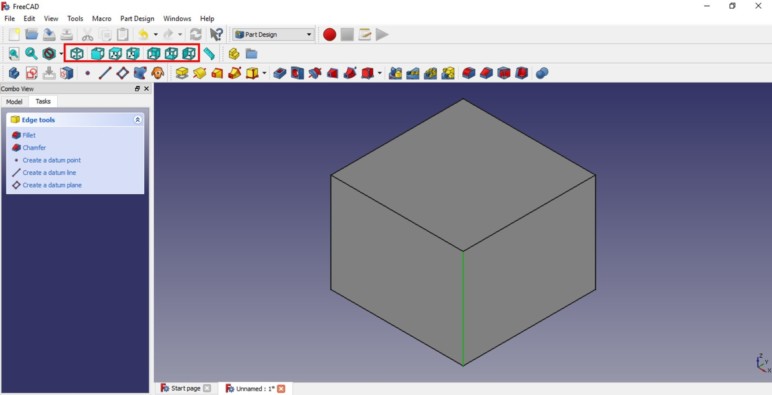
- You can also select different angles of view. The different views can be found in the central row of the FreeCAD toolbar. The axiometric view projects the object in a three dimensional way. You can also choose to look at one specific side.

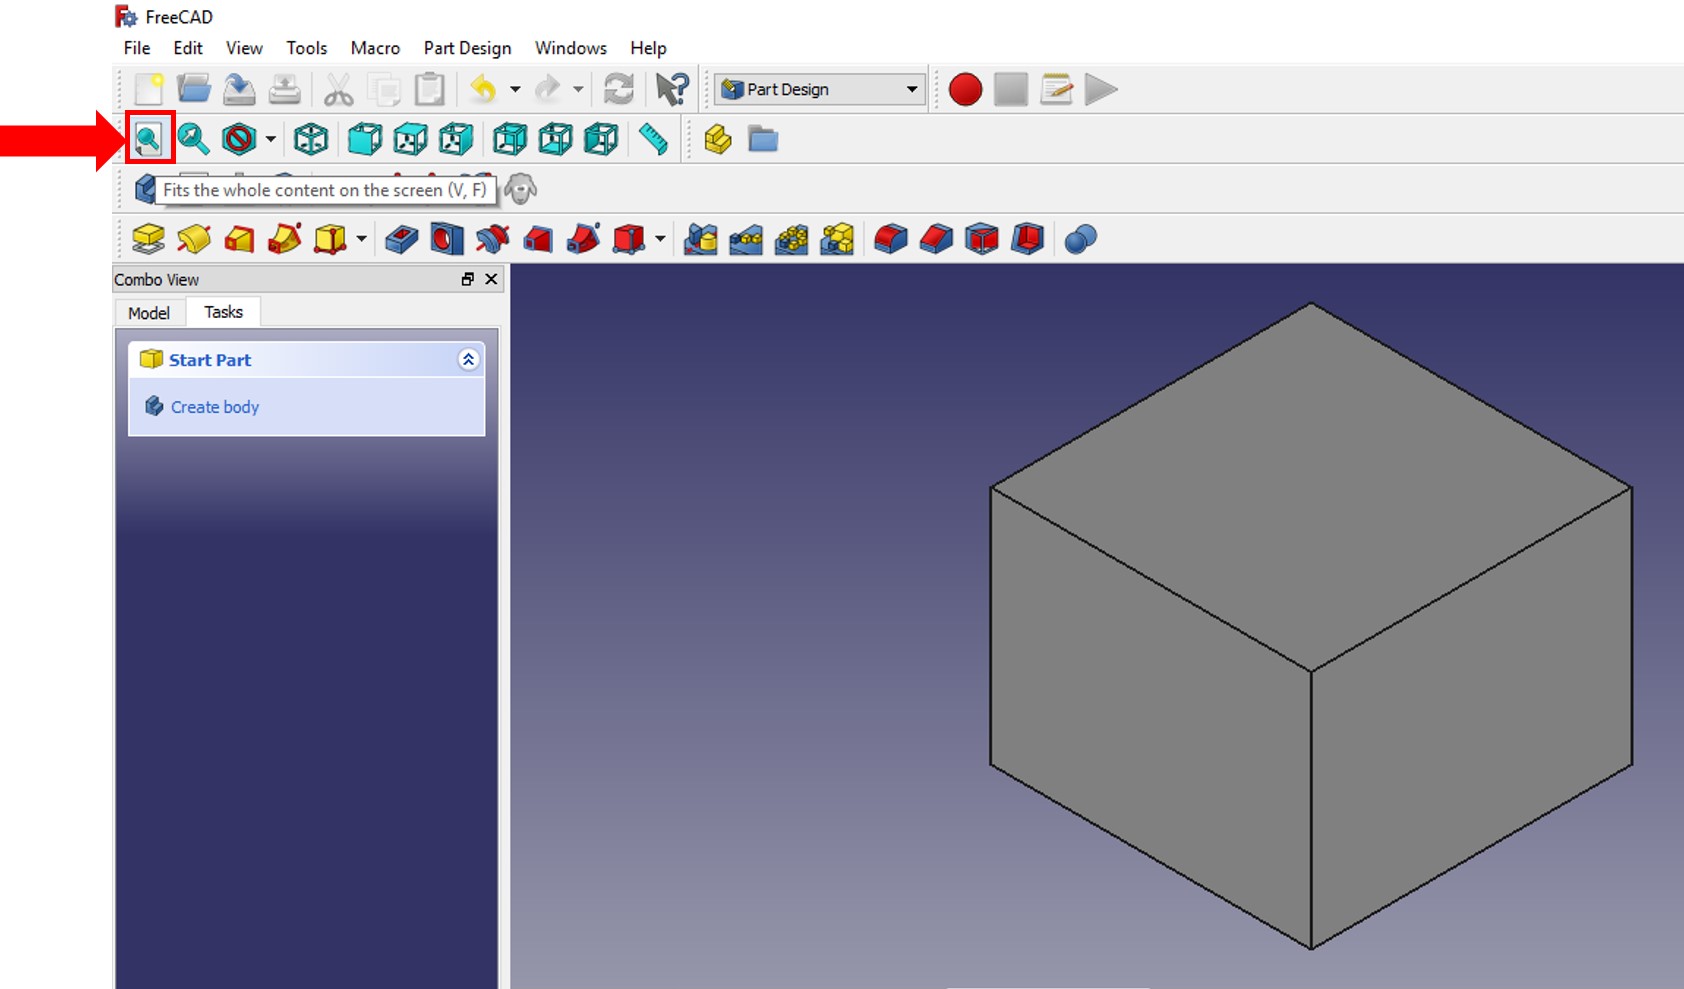
- If you lose track of your object press on the magnifying glass on the left of the view toolbar. This will center your entire project.
![freecad tutorial handlense]()
To begin with Lesson 2 of this FreeCAD tutorial, open the last lessons project and switch your Workbox to Part Design. At first, we want to hollow out our box with the cut feature.
1
FreeCAD Tutorial for 3D Printing
2.1 Basic Cut Feature
2
FreeCAD Tutorial for 3D Printing
2.2 Offset
3
FreeCAD Tutorial for 3D Printing
2.3 Advanced Cut
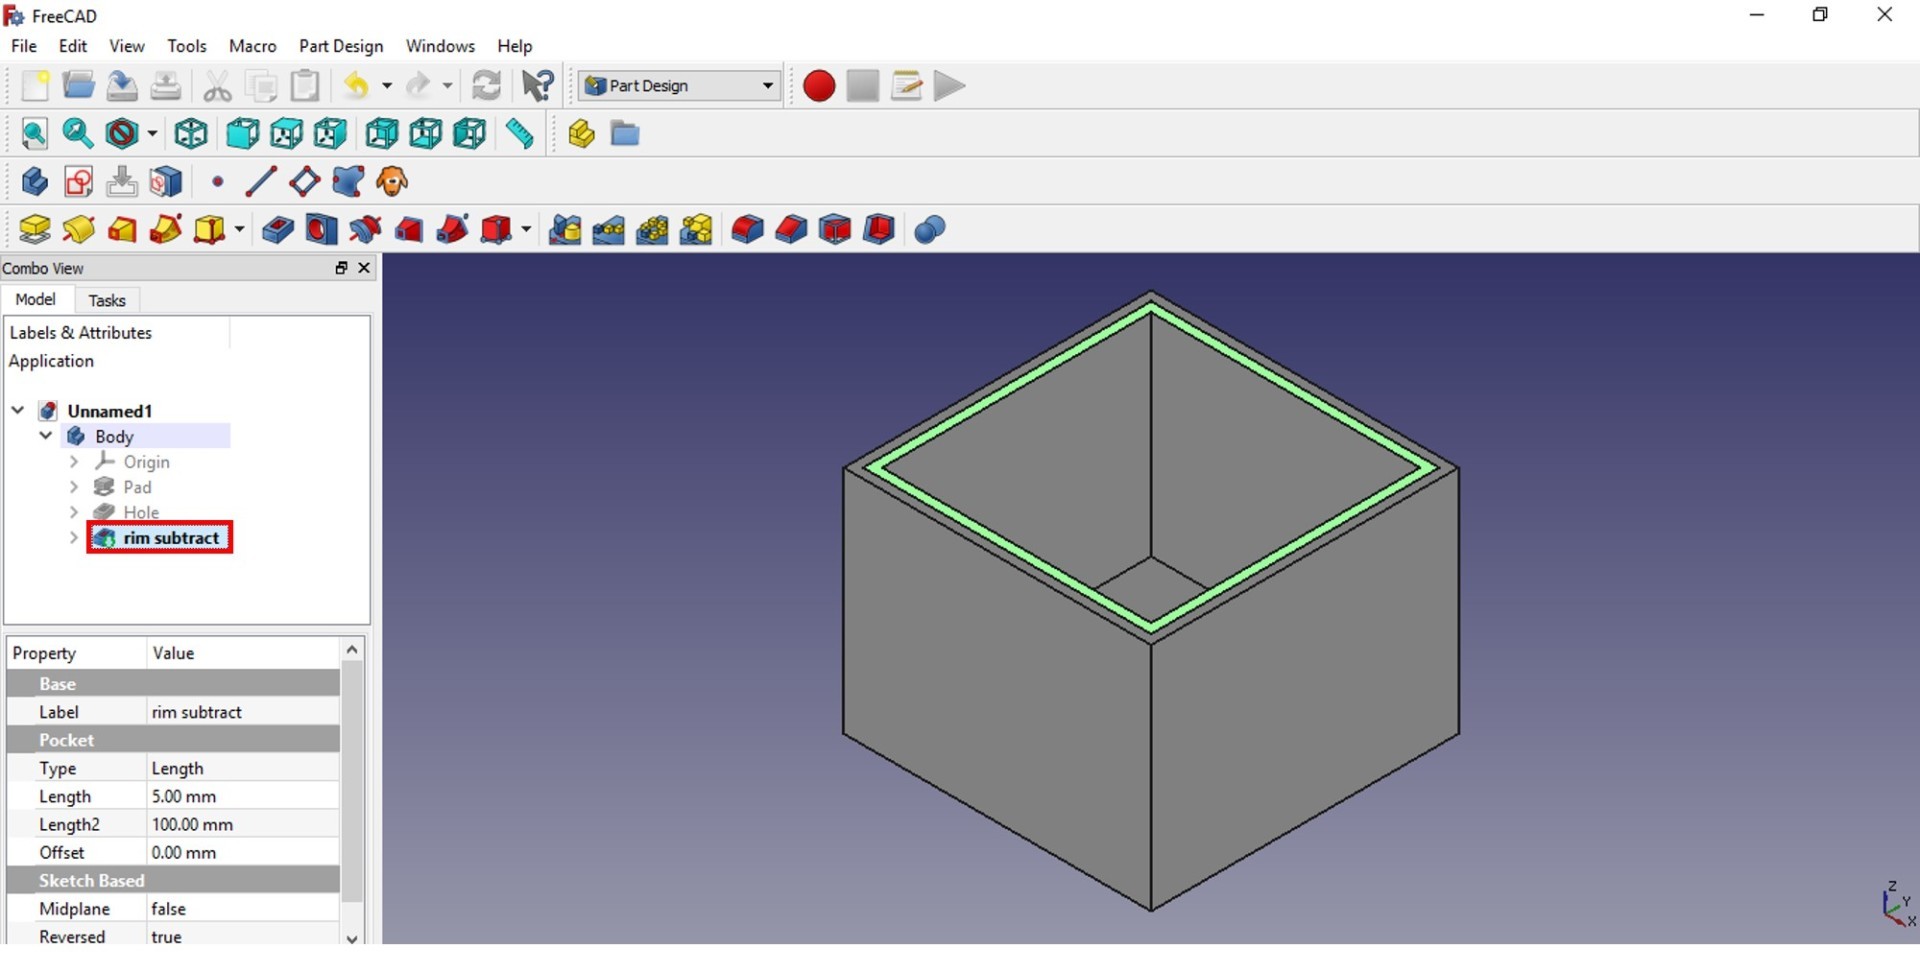
- Double click on “Rim 1″ sketch to edit it. Set your grid to 2.5mm and check grid snap. Now draw a second rectangle right on top of “Draft” starting at (-37.5, 37.5) with a dimension of (70,70). Close the sketch. Now you can also delete “Draft” by clicking on it and pressing the delete button.
- Select “Rim 1″ again and cut it by using the Pocket feature. Set Type to Dimension and Length to 5 mm. This will cut the space inside the rectangles.
![freecad tutorial rim subtract]()
In lesson 3 of this FreeCAD tutorial, you are going to learn how to multiply a piece and make corners round. To begin open the box you created in lesson 2.
1
FreeCAD Tutorial for 3D Printing
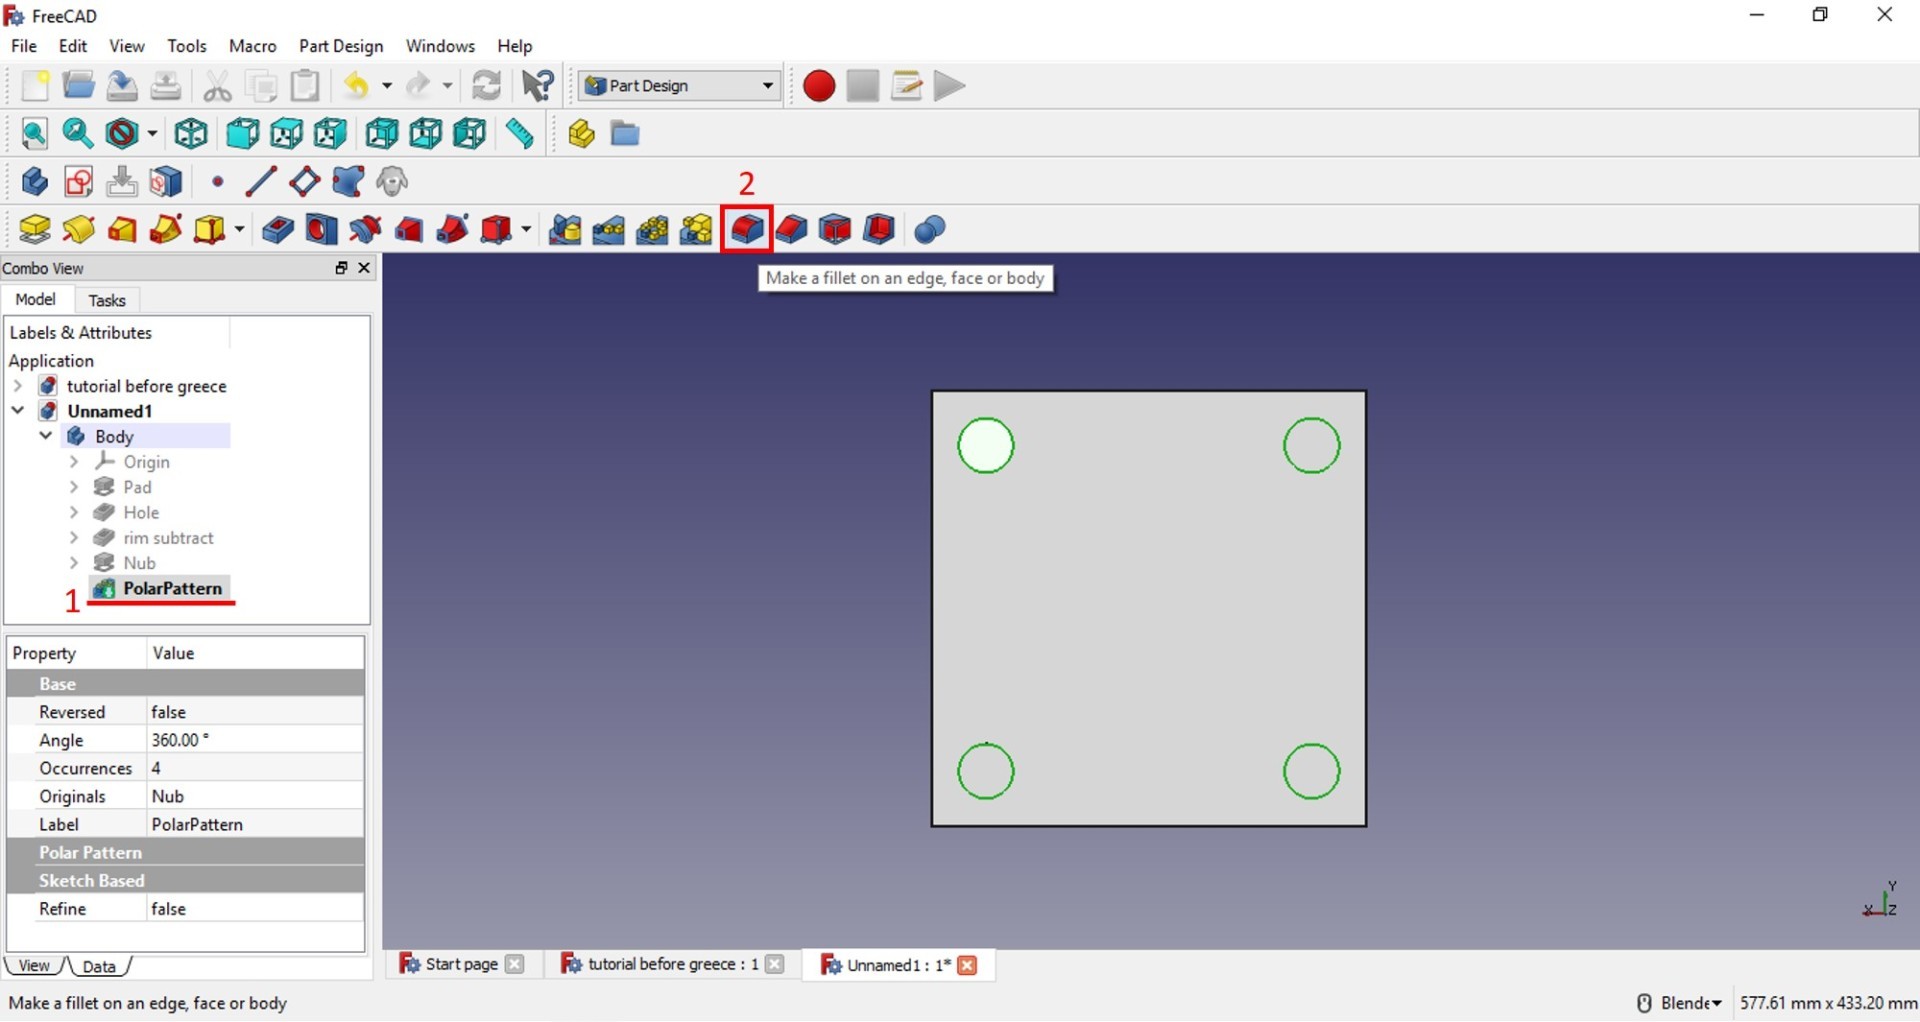
3.1 The Pattern Feature
2
FreeCAD Tutorial for 3D Printing
3.2 The Fillet Feature
Create a fillet from the circle pads with the radius of 2.4mm.
- Switch to bottom view and select all the Nubs. To select many parts hold down CTRL and click on different parts. To unselect a part just click on it again.
![]()
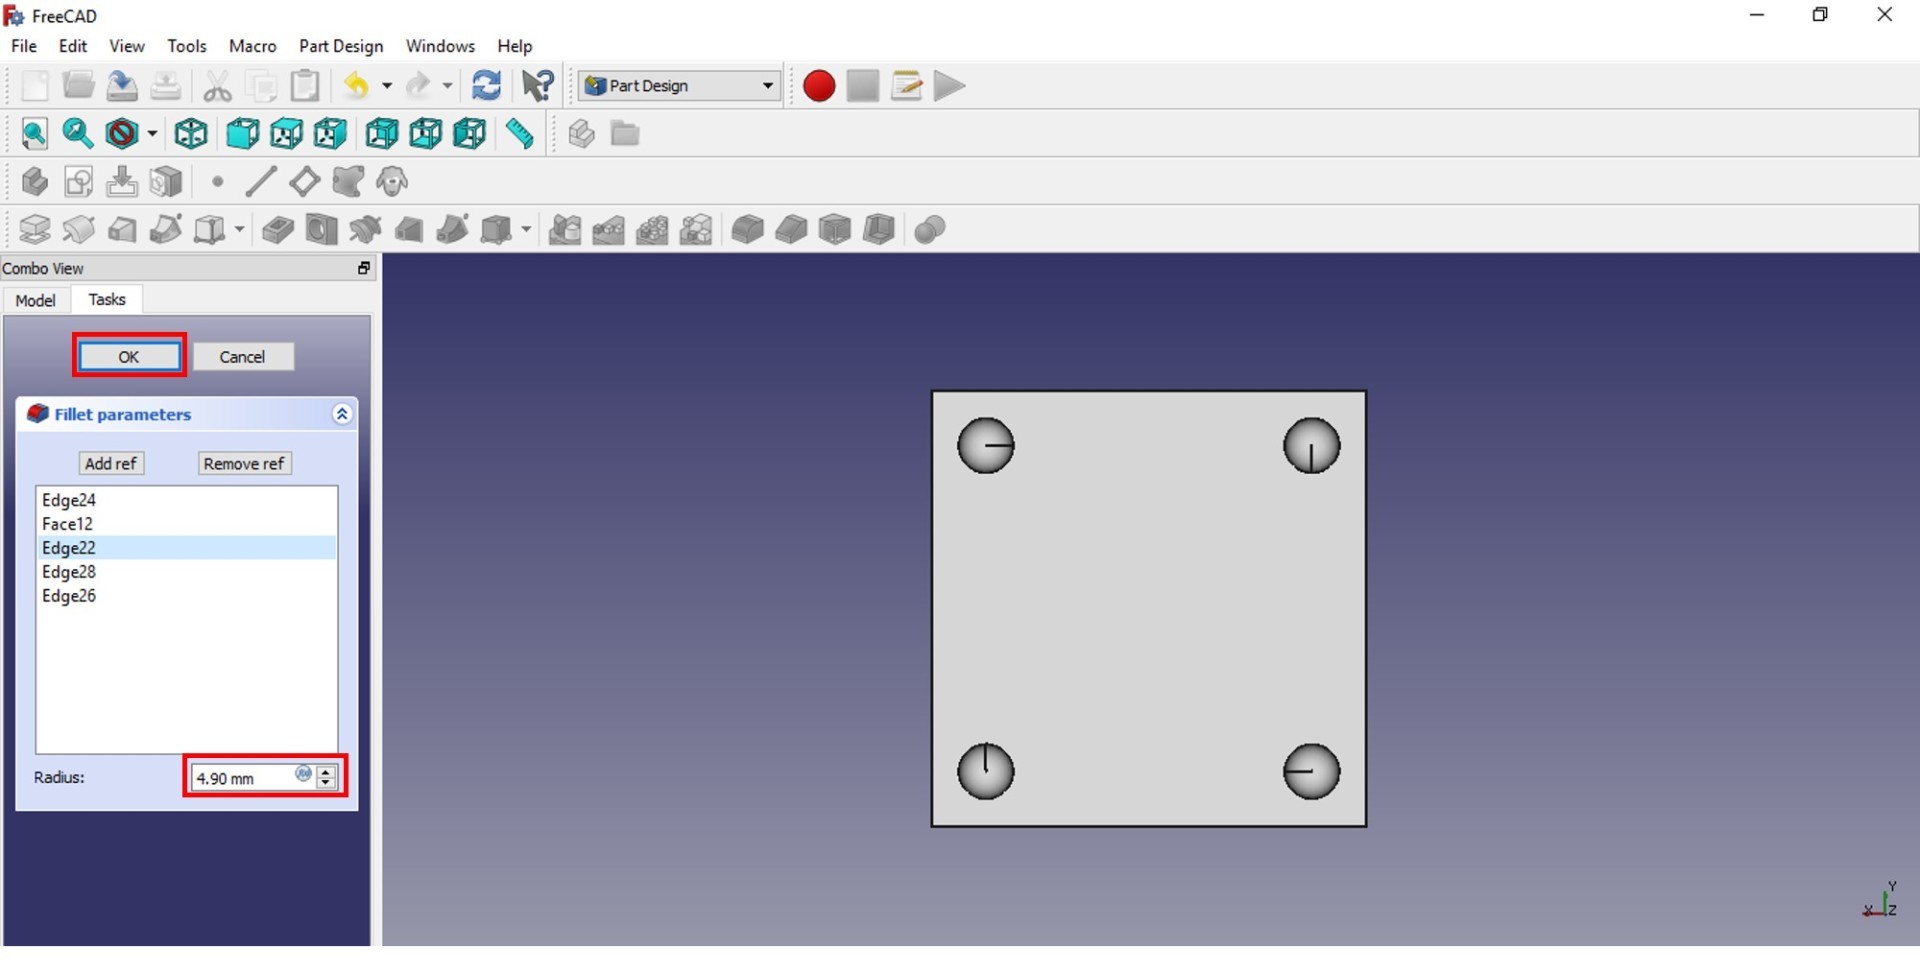
- Now select the Fillet Feature. The adjustable radius determines the size of your fillet. The radius has to be smaller than the entity you create a fillet so set the radius to 4.9mm. What you get looks just like little nobs. Close the feature and rename the Fillet to “Nub1″.
![freecad tutorial fillet 4.9]()
3
FreeCAD Tutorial for 3D Printing
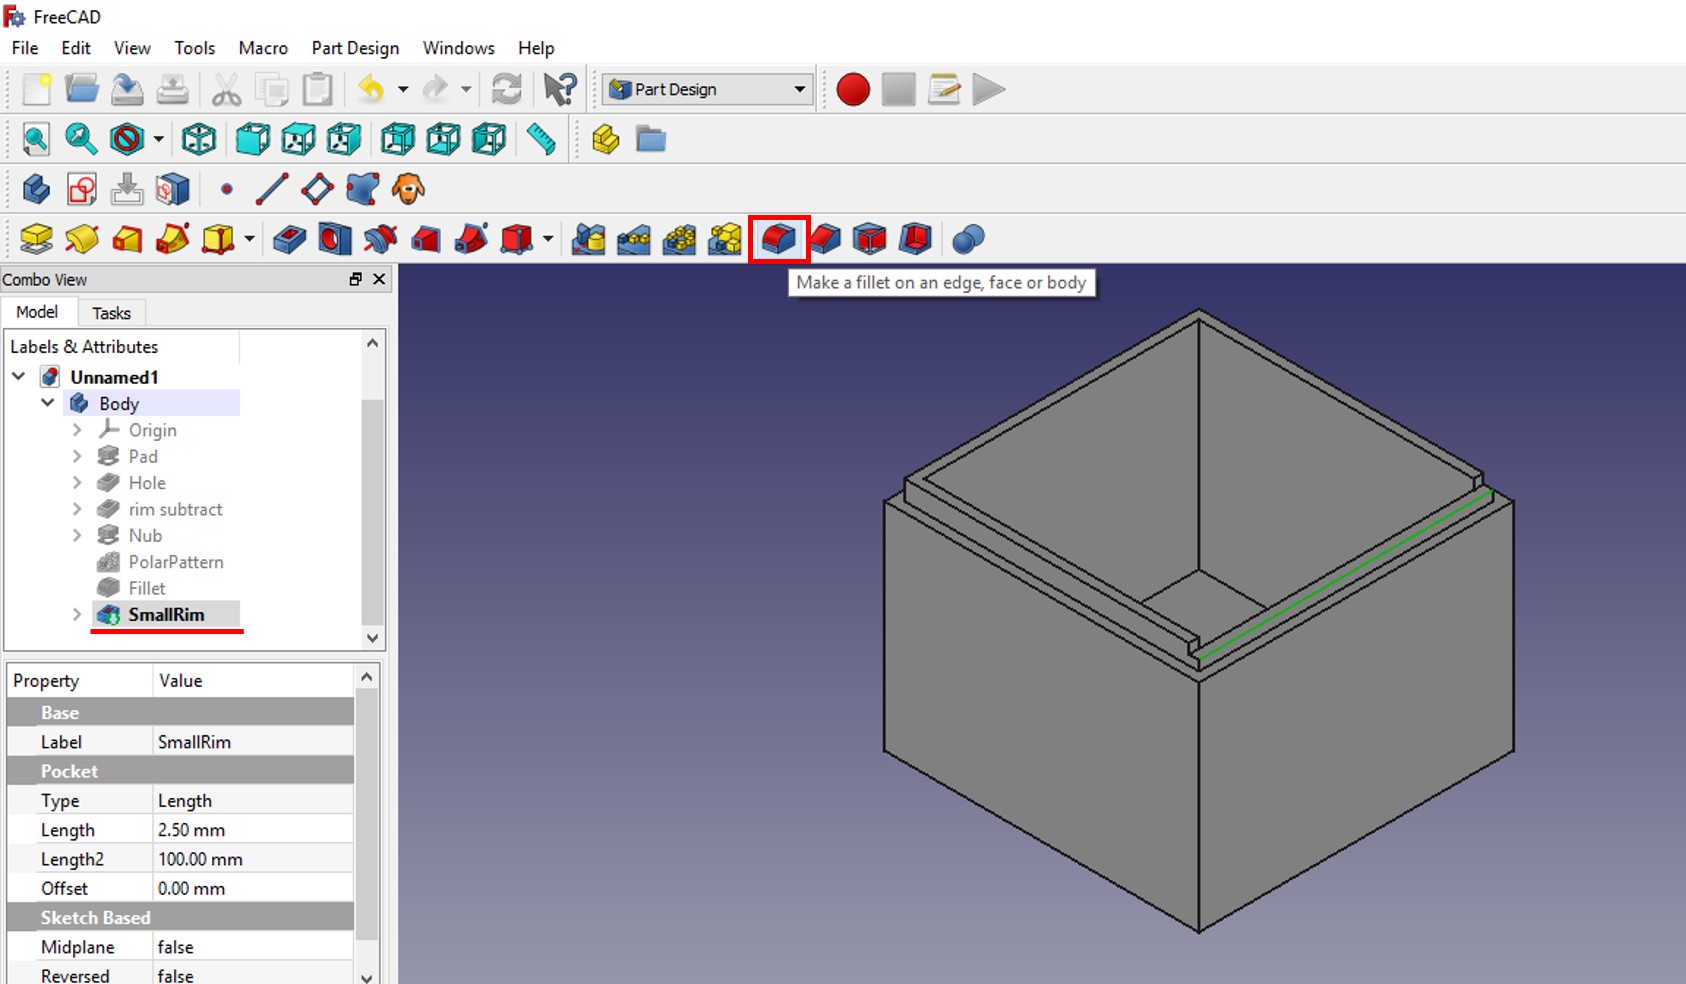
3.3 How to make corners round
First create a rectangle on the existing rim. Cut it by 2.5mm and then select the outward rim of your box to create a fillet.
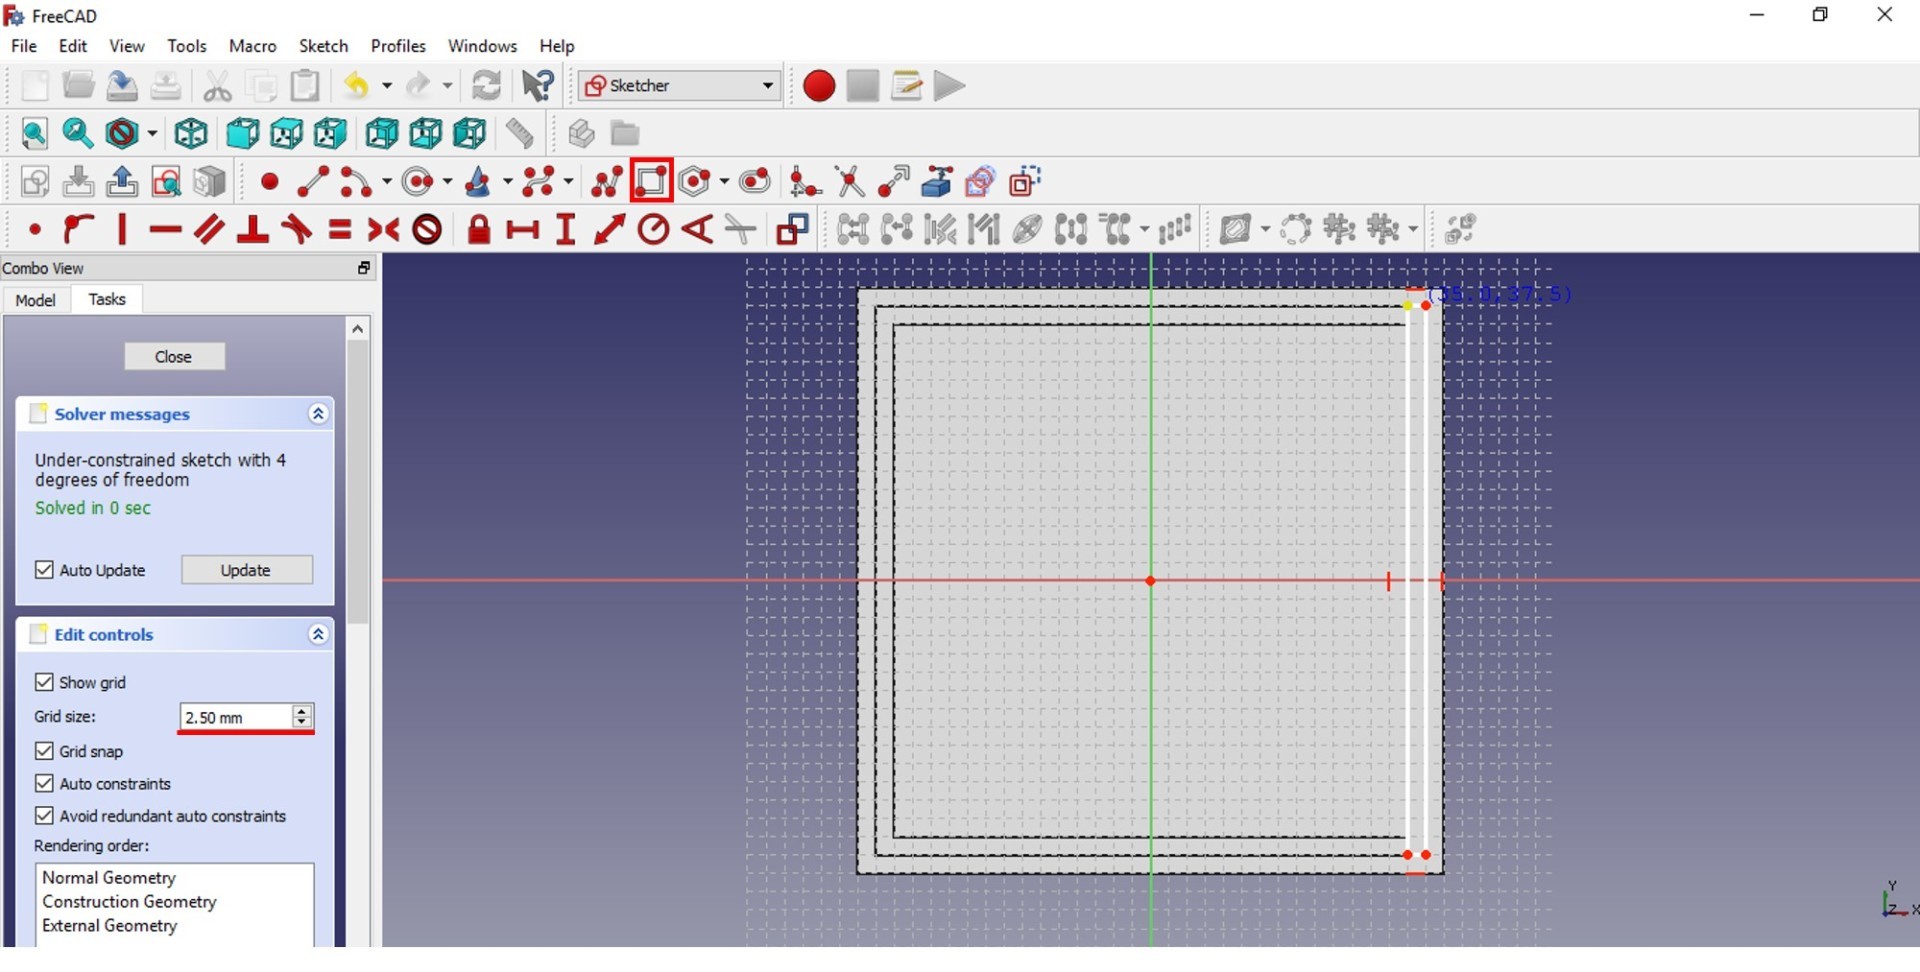
- Switch to top view and create a new sketch on the rim you created in lesson 2.
- Now draw a rectangle on the right side starting at 35.0, 37.5and make it 2.5 x -75.0 big. Exit the sketch and proceed to the next step.2. Create a new pocket with the sketch from 1., set the length to 2.5mm and uncheck reversed. Also, rename the pocket to “SmallRim”.
![freecad tutorial upper view fillet 2.5]()
Draw a small rim by sketching a rectangle on the right side of the box. ![freecad tutorial smallrim]()
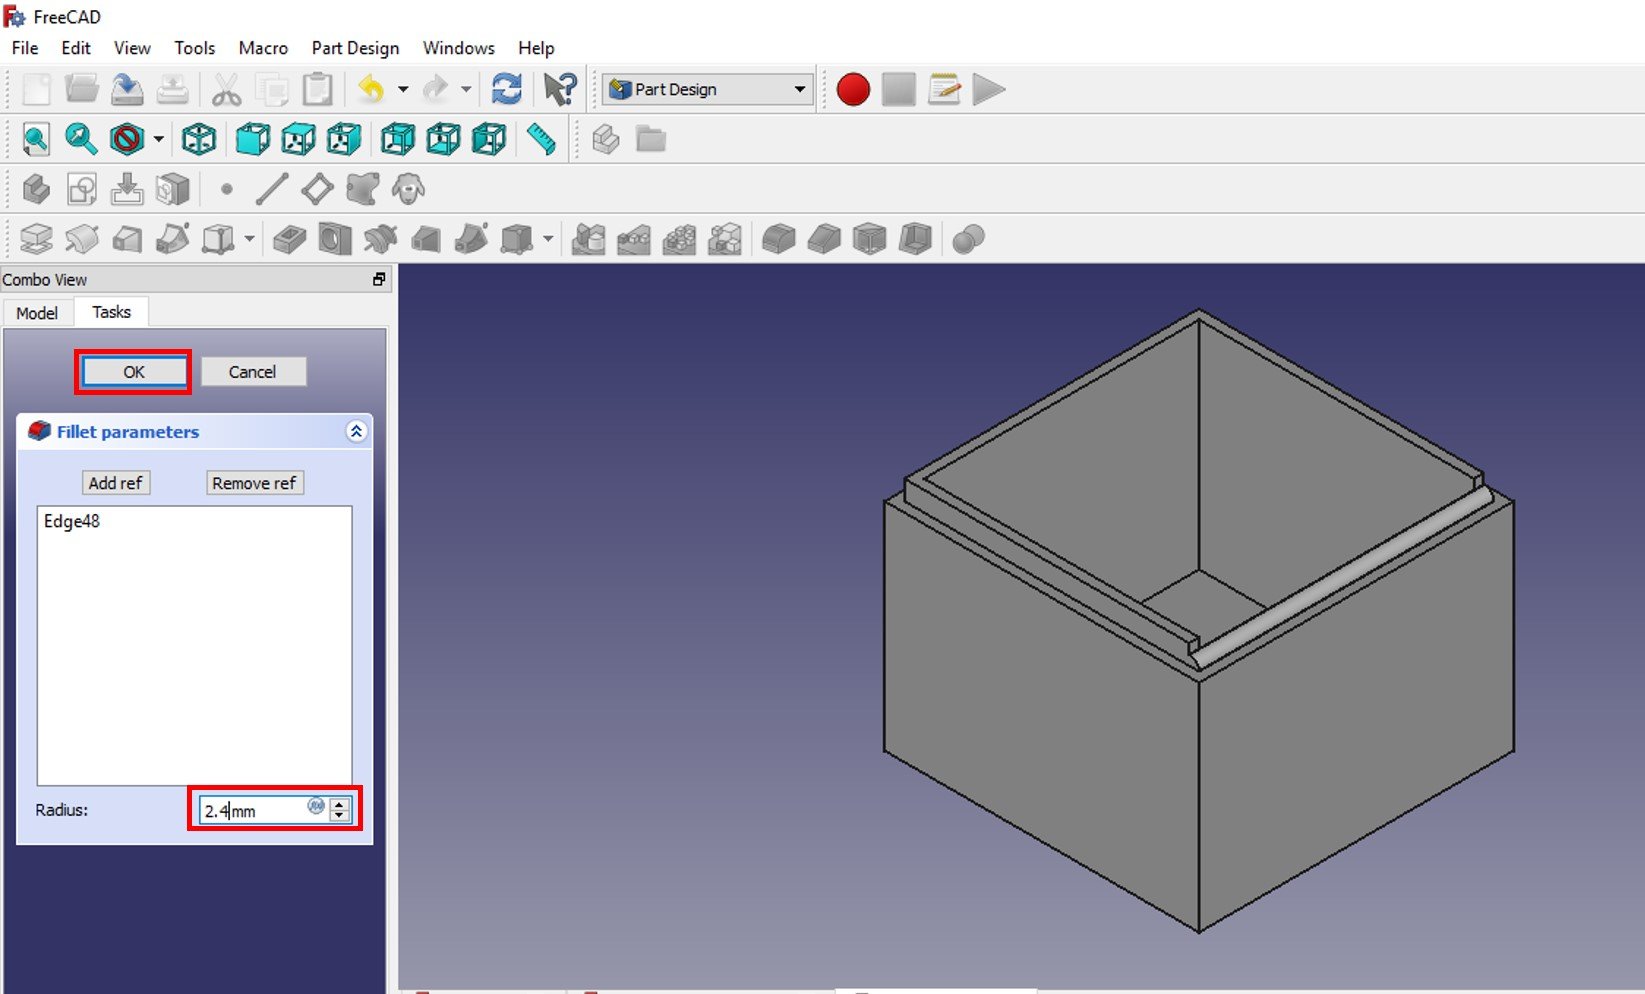
A fillet will be made in the next step on the with the newly drawn rim. - Now click on the outward edge of SmallRim and click on the Fillet Feature. Set the radius to 2.4mm.
![freecad tutorial small rim applied]()
Make a fillet with a 2.4mm radius.
In lesson 5 of this FreeCAD tutorial, you will create the cover of your box. The cover will be curved and hollowed out with the Revolution feature. No, you are not going to overthrow any government but you will create a solid curved shape around a sketch. To begin open a new document and save it as “Box cover”. Then switch your Workbox to Part Design.
1
FreeCAD Tutorial for 3D Printing
4.1 The Revolution feature
2
FreeCAD Tutorial for 3D Printing
4.2 Cut with two objects
So, you are all set to 3D print your model.
If you don’t own or have access to a 3D printer, you always can use a 3D printing service like the ones that you find here: Craftcloud – 3D Printing & Price Comparison Service by All3DP.
Be aware that minor modifications might be needed to tackle problems that may arise during the 3D printing process.
- You will need to add supports. The contact area between the print and the bed is only that which you added in the nub. Hence, expect that your print won’t adhere flawlessly without increasing the contact surface or adding a brim on each nub. You can also try setting your fillet in step 3.2 to 4.5 mm.
- You will need to support bridges. The distance between the nubs is way too long for the bottom of your box to hold firm. Supporting the bridges should avoid the first suggestion (to add brims) but keep it in mind in case you face adhesion problems.
- Remember to print both models to 100% to ensure a perfect fit between the lid and the body.
- Post processing the box can include polishing the surface and adding a hinge to hold your box open.
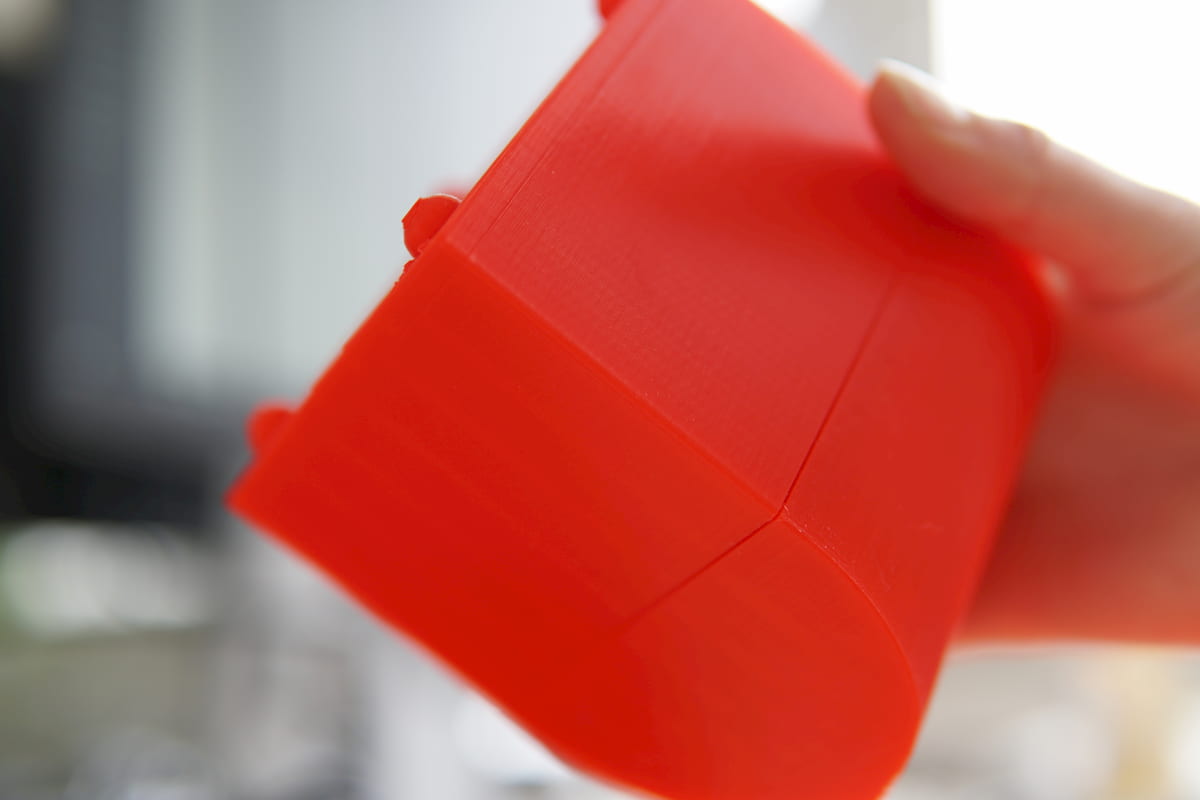
![3D printed box and rim]()
3D printed box and rim
![]()
3D printed box and lid. ![box and lid free cad tutorial]()
Box and lid


Congratulation on completing this FreeCAD Tutorial for 3D Printing!
If you have any questions or problems regarding this FreeCAD tutorial, please do not hesitate to leave a comment. Also, if you want to add suggestions for this course, please use our feedback forum – thanks!
License: The text of “2019 FreeCAD Tutorial for 3D Printing – 5 Easy Lessons” by All3DP is licensed under a Creative Commons Attribution 4.0 International License.
Subscribe to updates from All3DP
You are subscribed to updates from All3DP


Comments
Post a Comment